ZEROPINK | VCA Comp
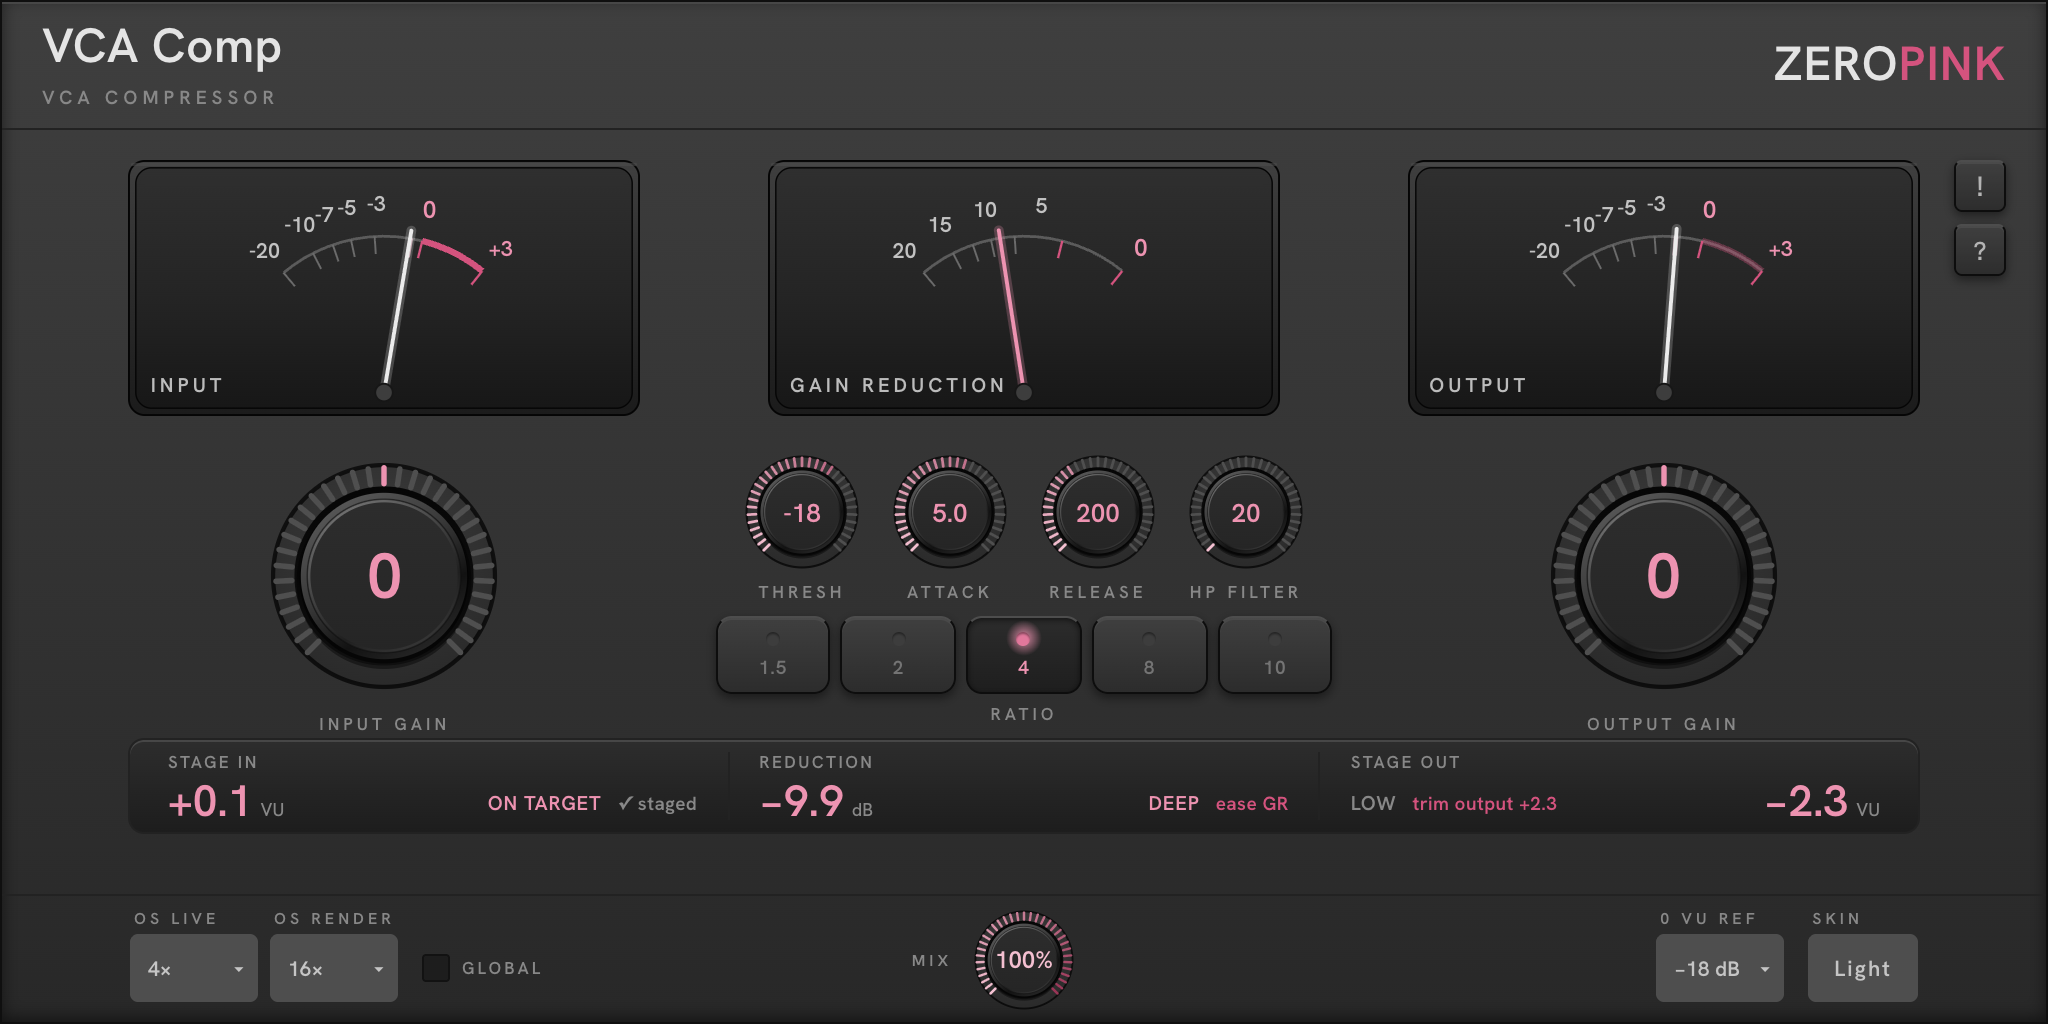
Before anything else:
get to zero.
VCA Comp assumes you have set your level before you start compressing. That is not housekeeping — it is the whole method, and every ZEROPINK plugin is built around it.
0 VU = −18 dBFS. That is the reference the meters are calibrated to, and where analogue equipment expects to be fed. Modern digital sessions routinely run 15–20 dB hotter, which is why compressors that sound effortless on one engineer's mix sound crushed and lifeless on another's.
On a VCA the consequence is specific: THRESHOLD is an absolute level, not a relative one. A threshold of −18 dB means −18 dB, and if you arrive 12 dB hot, that setting is suddenly 12 dB deeper into the signal than you intended. Every stored preset, every threshold you have learned by feel, is only meaningful from a known starting point.
- Play the loudest section of the part.
- Bring the INPUT needle to around 0 VU — clip or region gain in your DAW is the better fix; INPUT GAIN on the plugin is the quick one.
- Only then set THRESHOLD — −18 dBFS is the suggested starting value.
The STAGE IN readout tells you exactly how far off you are and what to do about it. It does not report a number and leave you to interpret it — it names the state and prescribes the correction:
That reads: you are 5 dB below reference, and the fix is to add 5 dB of input gain. When you land, the state word changes and the prescription disappears.
Get this right and the rest of the plugin behaves predictably from session to session. Skip it and you will spend the afternoon fighting a threshold that keeps meaning something different.
Linearity, which is to say
no opinion of its own.
The VCA bus compressor — the circuit at the centre of the great mixing consoles, the glue of four decades of records. A control voltage sets the gain, directly and linearly: nothing in the path has to warm up, saturate or relax — rebuilt here with precise digital control.
That linearity is the character. Where the optical cell has a memory and the FET has a temper, the VCA does exactly what you tell it — every timing decision is yours, with no opinion of its own to override it.
That is why it became the standard mix-bus compressor — the reason a mix from a real desk sounds finished. Predictable, repeatable, quiet enough to leave across a whole record.
It is also the most demanding of the three: the heritage rewards engineers who know what they want.
Mix bus and stem glue. Drum busses that need to breathe with the tempo. Anything where you want a specific attack and release rather than a flavour. Programme material where transparency matters and the compression should be felt as cohesion, not as an effect.
Colour. If you want the part to sound compressed — thick, forward, obviously worked — this is the wrong tool and no setting will get you there. That is FET Comp territory. Equally, if you want a compressor that smooths a performance without you deciding how, OPTO Comp does that better by having fewer choices.
Choose VCA Comp when you know what you want the envelope to do. Choose one of the others when you want the circuit to decide.
Three orders of magnitude,
and one way out.
How fast the VCA responds once the signal crosses threshold. This range is enormous compared to a FET — three orders of magnitude — and that breadth is the point. You are not picking a flavour, you are deciding precisely which part of the envelope gets compressed.
Fast (0.1–3 ms) catches transients and removes them. Medium (5–20 ms) lets the initial hit through and compresses the body behind it. Slow (30–100 ms) leaves the attack entirely intact and works only on sustain — on a mix bus this is usually what you want, because it preserves the punch that makes the record feel alive.
Short release re-opens between events and pulls up everything in the gaps — density, room, pump. Long release stays down through a phrase and sits transparently behind the source. On a bus, release decides whether the compression breathes with the tempo or fights it.
Drag RELEASE past the top of its travel and it latches to AUTO — the ring fills completely and the readout in the knob reads the word instead of a figure.
In AUTO the recovery time is derived from the programme itself: it moves quickly after a short transient and slowly after a sustained passage, continuously, without you choosing a compromise between the two. It is the one place on this plugin where the circuit makes a decision for you.
Reach for AUTO on dynamic programme material — a full mix, a live take, anything where a fixed release is either too fast for the quiet parts or too slow for the loud ones. Use a fixed value when you want the compression to have a rhythm of its own. Dragging back down leaves AUTO; double-click resets to 200 ms.
Threshold decides how much.
Ratio decides how hard.
Five caps: 1.5 · 2 · 4 · 8 · 10. Ratio decides how much of every dB past the threshold is held back — at 4:1, four dB in becomes one dB out. Where threshold decides how much of the signal is compressed, ratio decides how hard.
Ratio and threshold trade against each other. A high ratio with a high threshold compresses only the peaks, and hard — the same average reduction reached with a low ratio and a low threshold compresses nearly everything, gently. Those two settings measure the same on the GR needle and sound nothing alike.
On a bus, prefer the second approach: 1.5 or 2, threshold low enough that the needle is always doing a little. Reserve high ratios for individual tracks that genuinely need holding down.
HP Filter · 20 – 500 Hz
A high-pass filter on the detector only — not on the audio. Nothing is removed from the signal you hear; the filter changes what the compressor listens to.
Low frequencies carry most of the energy in a mix. A kick drum and a bass note contain far more power than a vocal, so a full-band detector reduces gain on the whole mix every time the kick lands — a mix that ducks and pumps in the midrange for reasons that have nothing to do with the midrange. Raise the filter until the GR needle stops following the kick.
This is the single most useful control on a mix bus compressor and the one most often left at 20 Hz. If bus compression is making your mix feel smaller rather than more cohesive, come here first.
Three needles, one grammar.
All three are true VU — around 300 ms integration, IEC/ASA ballistics. They show what you would feel, not sample peaks. On a compressor this controllable that matters: the needle and your attack setting are measuring different things, and reading one as the other is the commonest way to mis-set this plugin.
Input
Level arriving at the detector and the VCA, after INPUT GAIN. Set this to 0 VU first; the threshold you choose next only means what you think it means from here.
Gain Reduction
How much gain the VCA is removing, reading right to left from 0. On a well-set VCA this needle should move like the music, not flicker.
Output
Level leaving the plugin, after OUTPUT GAIN. Bring this back alongside the input needle so you judge the compression, not the level.
The REDUCTION readout names how hard the compressor is working and tells you which way to go. On this plugin there are two routes down — raise the threshold, or drop a ratio — and they sound different. Raise the threshold when the compression is reaching too far into the material; drop the ratio when it is reaching the right distance but pressing too hard.
On a bus, CRUSH is almost always a mistake rather than a choice. If you want that much reduction on a mix, use MIX to blend it back rather than committing to it.
Oversampling, split for a reason.
OS Live / OS Render
Oversampling for the nonlinear stage, set independently for playback and export. Work at 4× — low latency, light CPU, audibly fine — and let the render setting (16× default) take over on export, where the extra passes cost you nothing but time. The render figure is the one that reaches the listener.
Global · Mix · 0 VU Ref
GLOBAL applies the oversampling setting across all ZEROPINK plugins in the session, not just this instance. MIX blends the uncompressed signal back in for parallel compression without a second bus. 0 VU REF moves every meter's zero point — five settings, −18 default, down to −30 dBFS for percussive material.
Skin
Switches the faceplate between Light and Dark mode. Cosmetic only; it has no effect on audio or on metering behaviour. Pick whichever holds up in your room — dark rooms and long sessions usually favour Dark, bright rooms Light.
Reported to the host at every setting, so delay compensation is exact. The figure in samples is fixed; the time it represents shortens as the session rate rises.
At the 4× default this is well under 1.5 ms at any rate — low enough to track through. Set OS Live to Off if you need a genuinely zero-latency path while recording.
Thirty days, nothing held back.
VCA Comp installs as a fully functional 30-day trial. Nothing is disabled, nothing is muted, no noise is injected. A header banner shows the time remaining.
When the trial ends the plugin outputs silence and displays a persistent banner. Your session, settings and automation are preserved — entering a licence restores audio immediately, exactly where you left off.
Purchase delivers a signed licence block by email. Paste it into the plugin's licence dialogue. Verification happens offline on your machine; the plugin never contacts a server, and it will keep working forever on a machine with no internet connection.
Deauthorize removes the licence from the current machine, returning it to trial state, so you can move it to another. There is no activation limit and no account to log into.
The plugin does not appear in my DAW. Restart the DAW after installing. Logic rescans on launch and will validate the AU the first time it sees it. If it still does not appear, check that the DAW is not running in Rosetta.
The compression pumps on every kick. The detector is hearing the low end. Raise the HP FILTER to 100–150 Hz — it changes what the compressor listens to, not what you hear.
My mix sounds smaller with the compressor on. Usually too fast an attack removing transients, or a full-band detector ducking the midrange. Try 30 ms attack, HP filter at 100 Hz, ratio 2.
I cannot tell if it is helping. Match OUTPUT GAIN until STAGE OUT reads IN/OUT matched, then bypass. Louder always sounds better for the first few seconds; matching removes that illusion.
The trial banner says expired but I purchased. The licence has to be entered in the plugin — purchasing does not unlock it automatically, because verification is offline.
Lost your licence? Retrieve it from My Account, or read the full support pages. The 30-day trial download above is direct — no email required.